It’s true. There is no better time to start baking sourdough bread.
But if you have never tried before and start looking at recipes online the process can seem a little daunting. We have developed an easy process below to get you started and will follow up with a fantastic sourdough bread recipe so that you can begin using your starter!
BEGIN YOUR STARTER
30g Water / 30g Flour / Small piece of fruit (we used a couple of grapes)
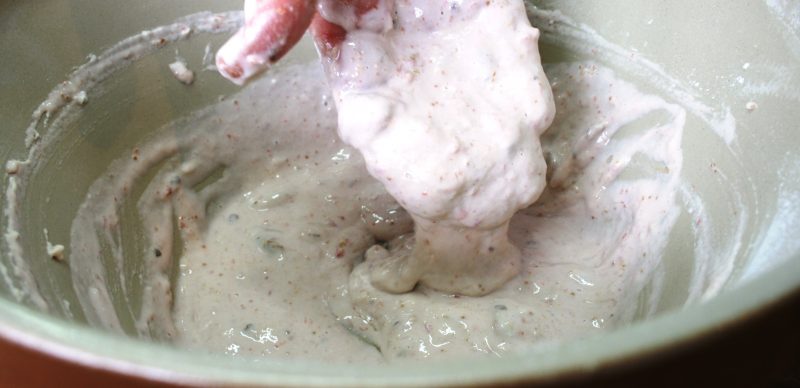
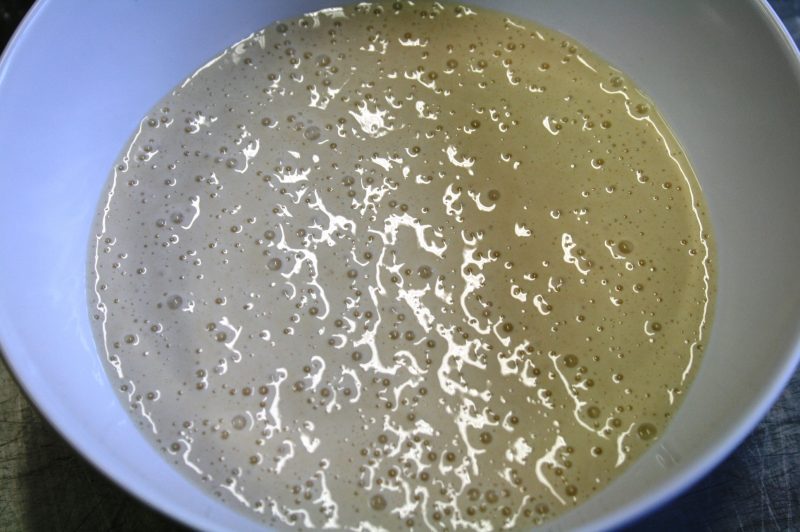
In a small bowl, mix your flour and water, and squash the grapes so some of the sweet juices leak out. Spoon this mixture into a small clean glass jar. Put the lid on top but do not screw it on so the starter is both protected from infestation and able to breathe. Leave the jar in a warm part of your house at room temperature for 3 days.
After 1 day; you won’t see much happening at all. No strong smells developing, no apparent gassy bubbles developing either.
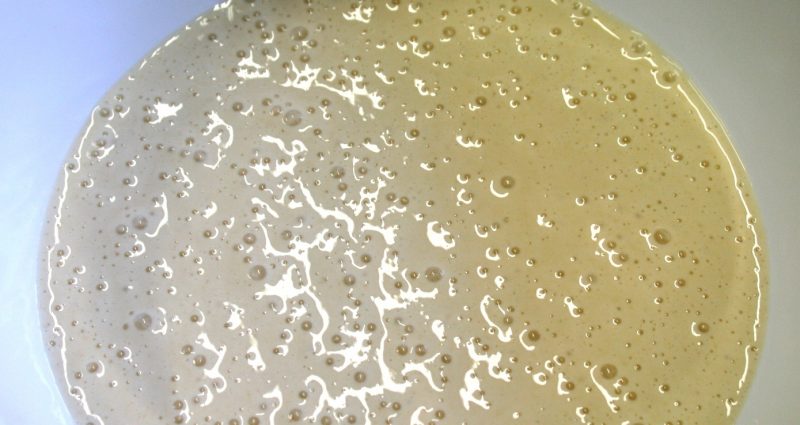
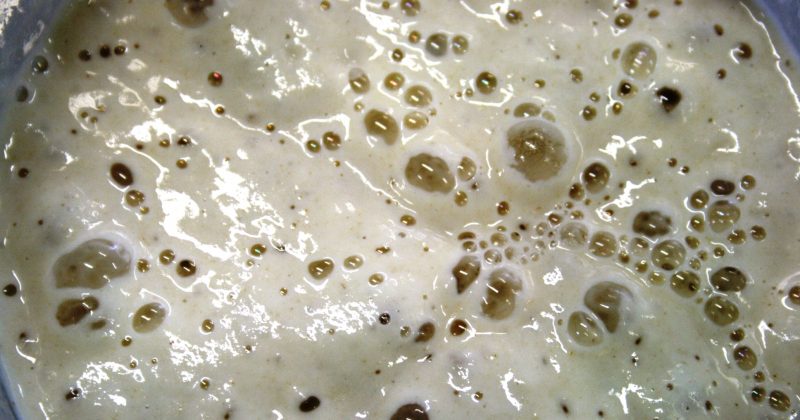
After 2 days; you may begin to see that your starter is becoming ALIVE! Some subtle fruity, sour, or lactic aromas may be developing, and you may start seeing some little gassy babbles appearing. If this is not happening for you yet, don’t stress, it may be a little cold and slow thus will need more time to begin fermenting.
After 3 days; you should see your starter is alive. A funky fermented aroma will have developed, and some gassy bubbles may have build up also.
VIDEO: HOW TO BEGIN A SOURDOUGH STARTER https://www.youtube.com/watch?v=JrLWc6anuNY
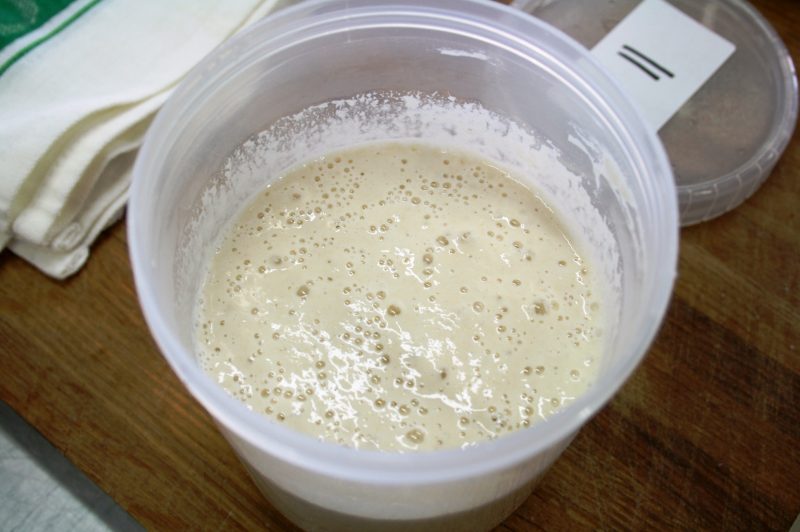
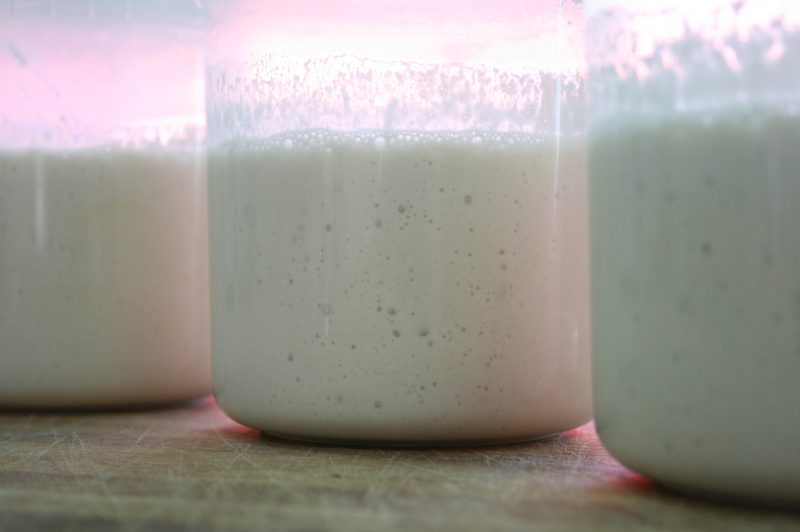
ANSWERS TO SOME FREQUENTLY ASKED QUESTIONS! If you are unsure whether your starter looks or smells like it should, just give it a go, it might be right after all! The only indications that your starter has gone “off” would be if you see mold, fuzz, or any unnatural colours (like black, blue, or green). Sometimes your starter will separate and a clear or slightly grey/cloudy liquid will appear floating at the top. It’s important to point out this is completely natural. Bakers call this liquid “hooch” which is a build up of alcohol as a result of the fermentation that has occurred in your starter. When you begin feeding your starter do not discard the hooch, simply mix it back in to emulsify as the hooch contributes to the flavour and aroma that will be feature in your sourdough loaves.
FEED YOUR STARTER
Now that your 3 day old sourdough starter is alive and kicking, you need to feed it twice a day at room temperature (at least 8-14 hours between each feed) in order to build it’s strength and activity. Remember, fermentation responds to temperature, so in warmer days things will happen more quickly, colder days things will happen more slowly (if you live in a particularly cold part of the world, or it’s a freezing winter day, you may get away with only feeding your starter once a day). Unfortunately it’s not strong enough yet to start making sourdough bread with, so follow the below feeding routine for a couple of weeks before you test out your first loaf.
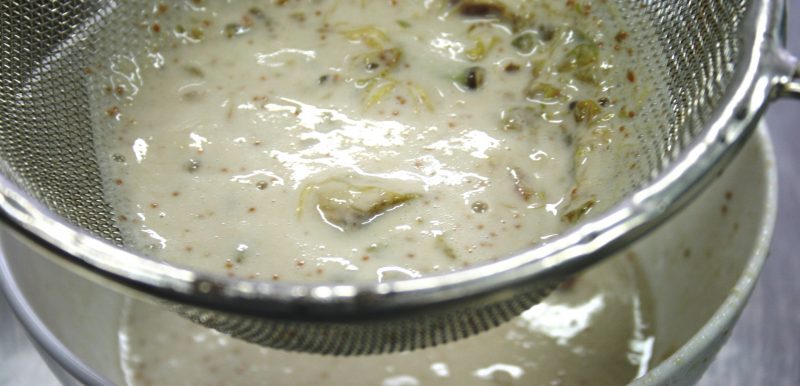
Firstly, pass your starter through a sieve to remove any fruit skins and seeds, then feed as below.
30g Water / 15g Starter / 30g Flour
HOW TO FEED YOUR SOURDOUGH STARTER https://www.youtube.com/watch?v=dLM-ZjLrGA4
ANSWERS TO SOME FREQUENTLY ASKED QUESTIONS! Make sure you are allowing 8-14 hours between each feed and keep your jar of starter in a warm part of your house with the lid on top but not screwed on tight. Keep feeding using the above amounts for at least two weeks to build up the strength of your starter. You may find after a couple weeks it is still not quite ready as the fermentation in your sourdough bread is lacking, so you may need to continue feeding a few more days to keep building it’s strength. Be aware, each time you feed your starter you are really only feeding 15g of starter with 30g flour and 30g water, so you will end up discarding a whole bunch of starter! But don’t worry, the discarded starter does not necessarily have to become wasted, you can keep all your discarded starter in the fridge for up to a week and use it to make some delicious recipes such as sourdough pancakes, sourdough waffles, or even sourdough crackers!
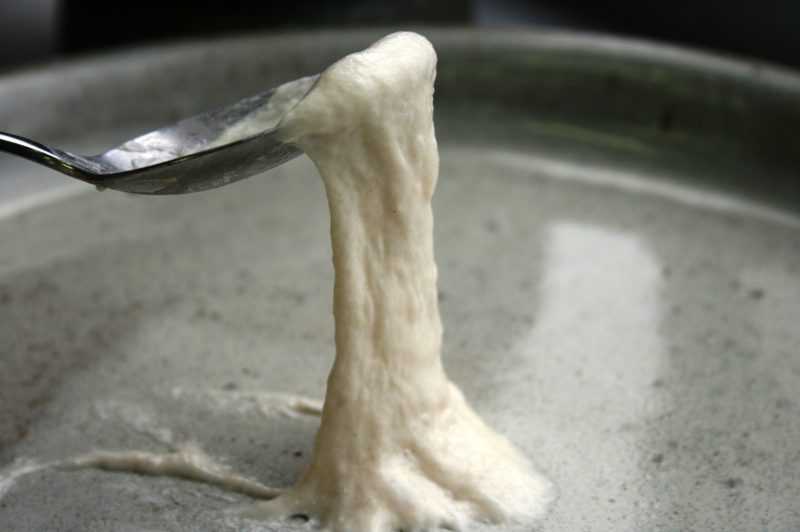
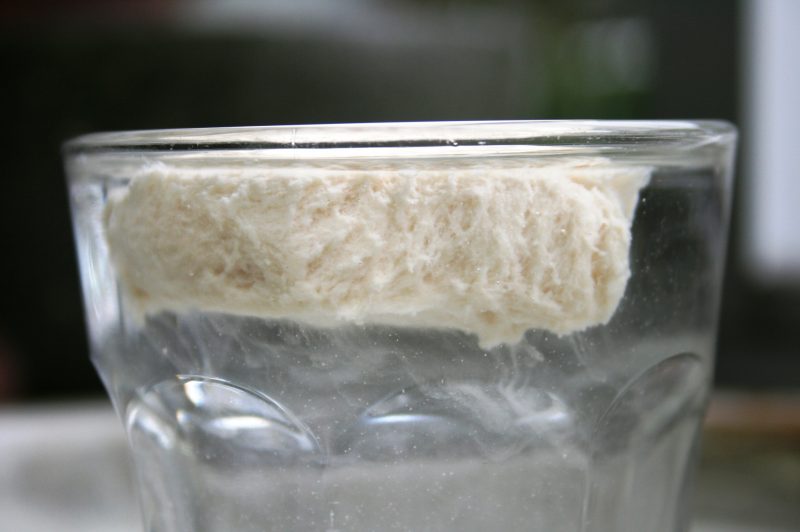
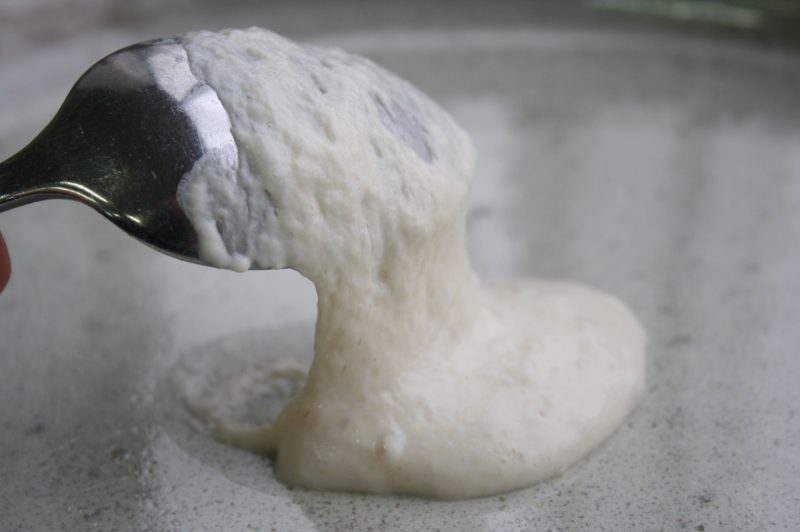
If you are unsure about the activity of your starter, you can perform a float test. Once you feed your starter, leave it to ferment for several hours and try floating a spoonful of it in a glass of cool water. If it is gassy and active enough it will float on top. Starter that sinks at this stage could either be under-fermented, over-fermented, or just not active enough to begin with (if this is the case, continue feeding until you build it’s activity).
BUILD THE VOLUME OF YOUR STARTER
So it has been at least two weeks and you have successfully begun the life of your starter, congratulations! Now it’s time to bake some bread.
In our next blog post, we have put together a fantastic sourdough bread recipe for you. Take note of the amount of sourdough starter your recipe requires. At the moment you are feeding 15g of starter with 30g of water and 30g of flour. When you add those amounts up it equals a total of 75g. It is likely your sourdough bread recipe will require more than this amount so you will need to start doubling the amounts you feed with so that you increase the volume of your starter.
Here is an example of how you could increase the volume of your starter with each feed.
1st feed: 30g Water / 15g Starter / 30g Flour (leave for 8-14 hrs) = 75g
2nd feed: 60g Water / 30g Starter / 60g Flour (leave for 8-14 hrs) = 150g
3rd feed: 120g Water / 60g Starter / 120g Flour (leave for 8-14 hrs) = 300g
The idea is to end up with enough volume of starter for your recipe, plus, enough to keep feeding for future baking.
ANSWERS TO SOME FREQUENTLY ASKED QUESTIONS! Don’t understand the concept of increasing the volume of your starter? It’s okay! You will notice that with each feed above, the ingredient amounts are simply doubled, meaning that although you have increased the overall volume of your starter, the overall ratio of flour to water in your starter doesn’t change. Therefore, you can actually feed your starter up to whatever volume you wish, so long as you retain the correct ratio of 2:1:2 (Water:Starter:Flour) and it will always work!
HOW TO BUILD THE VOLUME OF YOUR SOURDOUGH STARTER https://www.youtube.com/watch?v=uf169tKDse4
HOW TO CARE FOR YOUR SOURDOUGH STARTER LONG-TERM
Once you start baking with your starter, things get much easier, we promise! You likely won’t be wanting to feed your starter twice a day forever, right? We get it.
Once your starter is fed, it can be kept in the fridge for up to a week and does not require any attention or feeding. During this cold time it spends in the fridge, the fermentation slows down significantly and the wild yeasts go into a state of dormancy.
At the end of that week, you will need to wake it back up and decide whether you want to bake with it or not. If you choose to not bake with it, you will still need to at least feed it to keep it alive, happy and healthy. It is your little baby, after all.
Here are the two scenarios you will choose from.
To bake with your starter… take it out of the fridge and leave at room temperature for 4-8 hours to come out of dormancy. You will notice it bubble up again and come back to life. From here you will need to give your starter at least 2-3 feeds at room temperature to build up it’s strength before using it to bake with. Use this opportunity to increase the overall volume of your starter so that you have enough for your recipe, plus, enough to feed for next time.
To just feed your starter and keep it alive… take it out of the fridge and leave at room temperature for 4-8 hours to come out of dormancy. You will notice it bubble up again and come back to life. Feed your starter as normal and immediately put back into the fridge for up to another week.
Make sure you visit our next blog post for a wonderful sourdough bread recipe! Happy baking!